Chromebooks are becoming increasingly popular due to their affordability, ease of use, and seamless integration with Google services. However, one common question among users is whether there is a snipping tool on Chromebook. The good news is that Chromebooks come equipped with native tools that allow you to capture and edit screenshots effortlessly. In this comprehensive guide, we’ll explore everything you need to know about screen capturing on Chromebooks, including built-in features, third-party apps, and tips for getting the most out of your device.
Screen capturing is an essential tool for students, professionals, and casual users alike. Whether you need to capture a quick image of an important document, share a troubleshooting error message, or save a visual for reference, having a reliable method to capture your screen is crucial. Chromebooks offer several ways to achieve this, and we’ll delve into each option in detail.
This article is designed to provide actionable insights and step-by-step instructions, ensuring that you can confidently use your Chromebook’s screen capture capabilities. Let’s dive in and discover how you can make the most of this feature!
Read also:Vk Tickle Community The Ultimate Guide To Exploring And Engaging
Table of Contents
- Native Screen Capture Tools on Chromebook
- Using Keyboard Shortcuts for Screen Capture
- Exploring the Chrome OS Screenshot Tool
- Enhancing Functionality with Third-Party Apps
- Editing Screenshots on Chromebook
- Saving and Sharing Your Screenshots
- Tips and Tricks for Better Screen Capturing
- How Chromebook Screen Capture Compares to Windows
- Common Issues and Troubleshooting
- Conclusion: Mastering Screen Capture on Chromebook
Native Screen Capture Tools on Chromebook
Chromebooks come with built-in screen capture tools that are both easy to use and highly functional. These tools allow you to capture full screens, specific windows, or even custom regions of your display. Let’s take a closer look at what these native tools offer:
Full Screen Capture
To capture the entire screen on your Chromebook, simply use the keyboard shortcut Ctrl + F5. This will instantly save a screenshot of your entire screen to your "Downloads" folder. The process is seamless and requires no additional setup.
Window Capture
If you only need to capture a specific window, you can use the shortcut Ctrl + Shift + F5. This will take a screenshot of the currently active window, making it perfect for capturing individual applications or browser tabs.
Custom Region Capture
For more precise control, you can use the Chrome OS Screenshot Tool to select a specific region of your screen. This feature allows you to define the exact area you want to capture, giving you greater flexibility in your screen capturing efforts.
Using Keyboard Shortcuts for Screen Capture
Keyboard shortcuts are the fastest and most efficient way to capture screenshots on a Chromebook. Here’s a quick rundown of the most important shortcuts:
- Full Screen: Press
Ctrl + F5. - Active Window: Press
Ctrl + Shift + F5. - Custom Region: Use the Chrome OS Screenshot Tool (more details in the next section).
These shortcuts are intuitive and easy to remember, making them ideal for users who need to capture screenshots frequently.
Read also:Lynn Whitfield Daughter Exploring The Life Legacy And Family Connections
Exploring the Chrome OS Screenshot Tool
The Chrome OS Screenshot Tool is a powerful feature that allows you to capture custom regions of your screen. To access this tool, follow these steps:
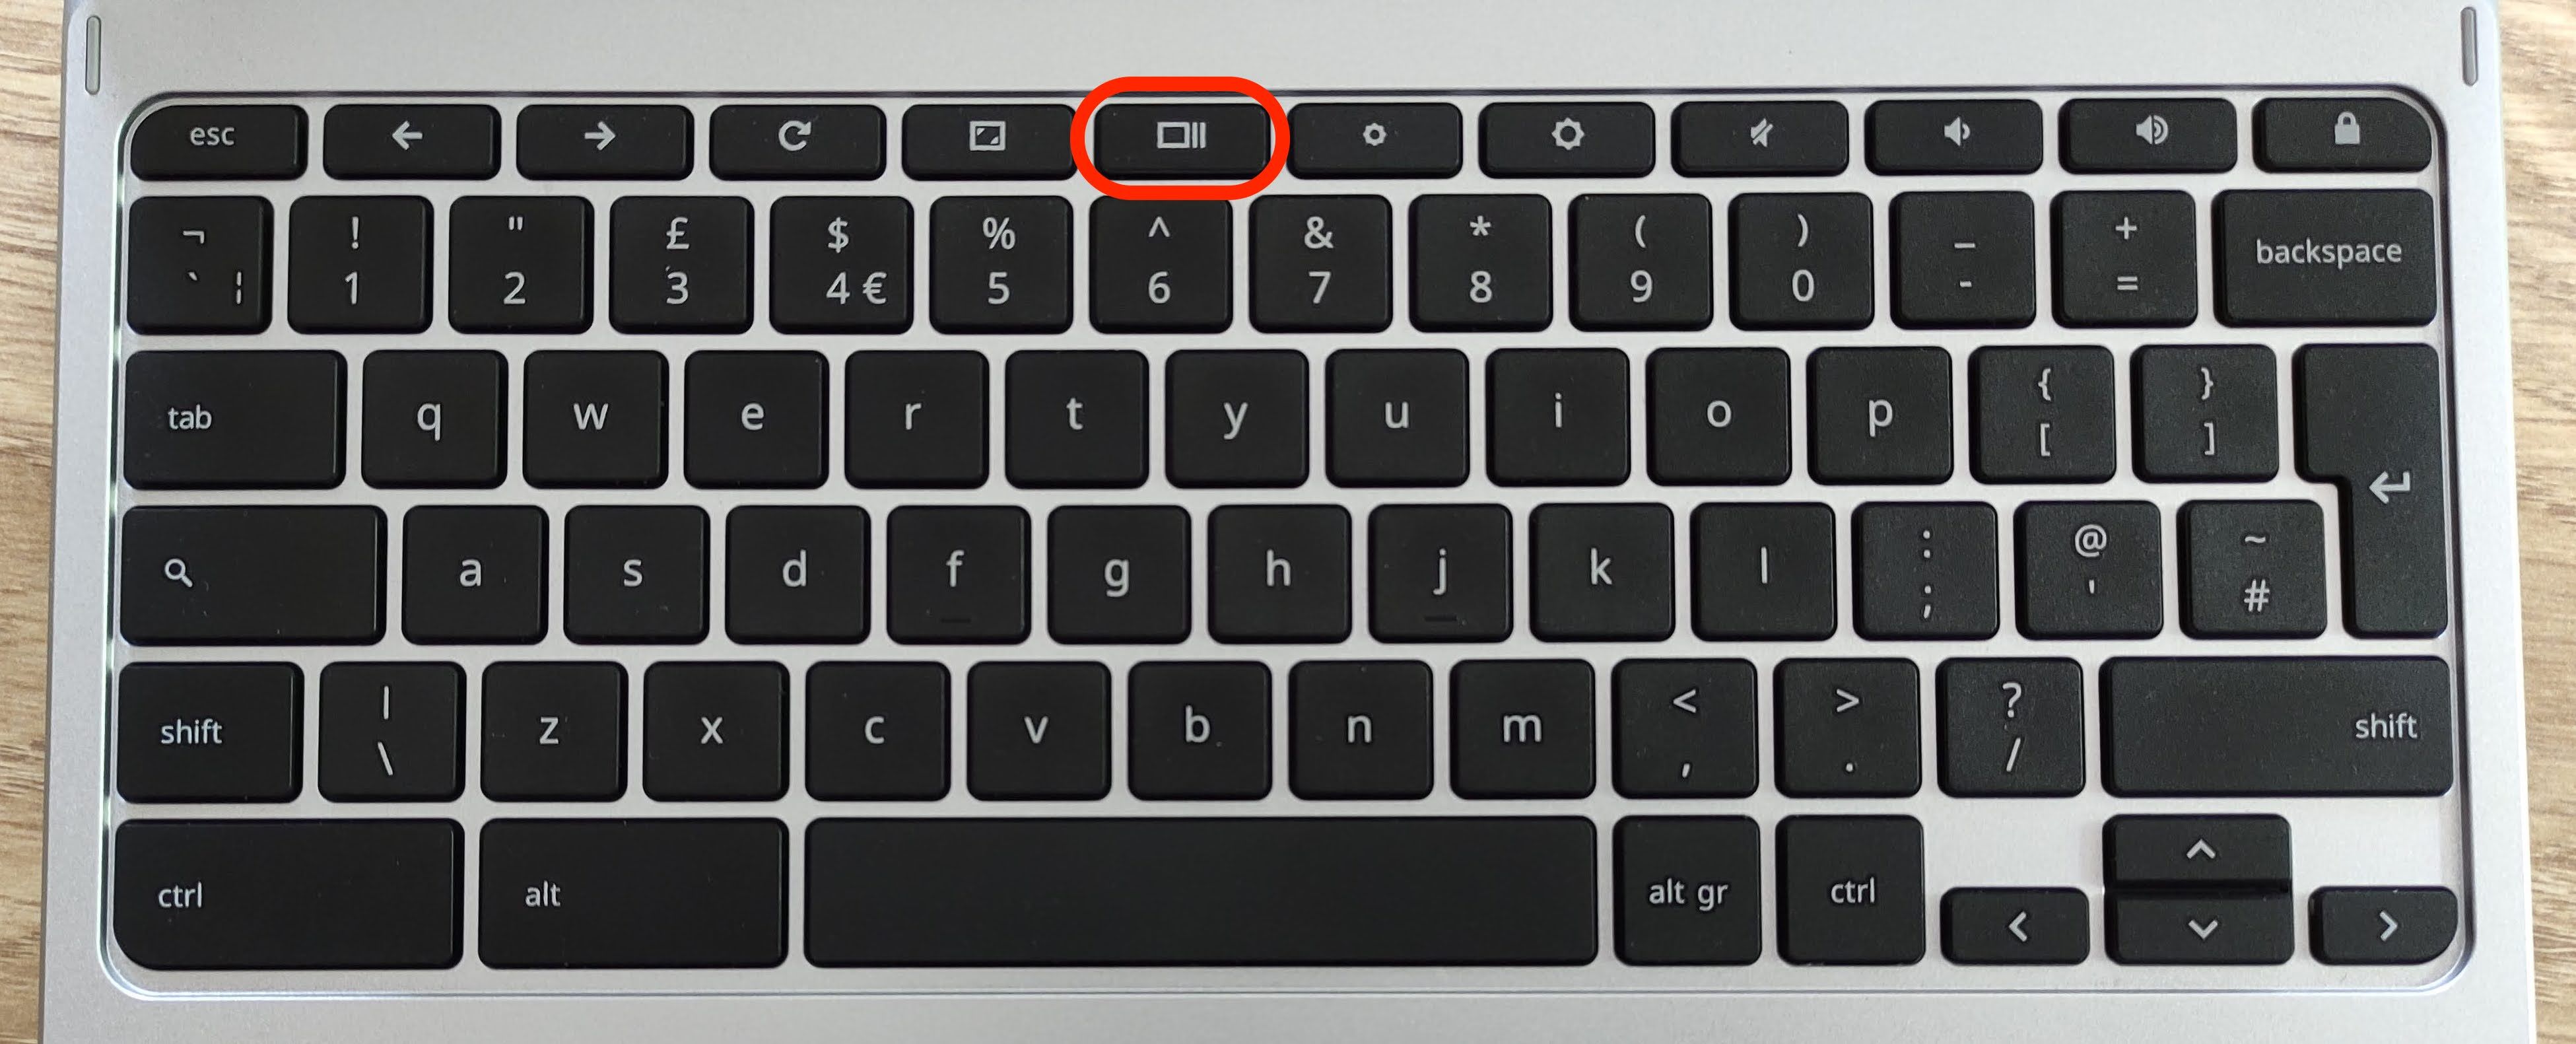
- Press the
Launcher Key(the square key on your keyboard). - Type "screenshot" in the search bar and select the Screenshot Tool from the results.
- Your cursor will change to a crosshair, allowing you to drag and select the area you want to capture.
- Release the mouse button to take the screenshot.
This tool is particularly useful for capturing specific parts of your screen, such as a portion of a webpage or a particular application interface.
Enhancing Functionality with Third-Party Apps
While Chromebooks offer robust built-in screen capture tools, you may want to explore third-party apps for additional features. Some popular options include:
Snagit
Snagit is a powerful screen capture and video recording tool that offers advanced editing capabilities. It allows you to annotate screenshots, add text, and even record your screen for tutorials or presentations.
Greenshot
Greenshot is a lightweight and free screen capture tool that integrates seamlessly with Chromebooks. It provides options for capturing full screens, windows, and custom regions, along with basic editing tools.
ShareX
ShareX is another excellent option for users who need advanced screen capture and sharing features. It supports cloud uploads, GIF creation, and more, making it a versatile choice for power users.
Editing Screenshots on Chromebook
Once you’ve captured a screenshot, you may want to edit it before sharing or saving. Chromebooks offer several ways to edit screenshots:
Built-In Image Editor
Chromebooks come with a basic image editor that allows you to crop, rotate, and add basic annotations to your screenshots. To access this editor:
- Open the "Files" app.
- Select the screenshot you want to edit.
- Click the "Edit" button (represented by a pencil icon).
Google Photos
Google Photos is another convenient option for editing screenshots. It offers features like cropping, rotating, and adding filters, all within a user-friendly interface.
Third-Party Apps
If you need more advanced editing capabilities, consider using third-party apps like Canva, Photopea, or Pixlr. These apps provide a wide range of editing tools and are accessible directly from your Chromebook.
Saving and Sharing Your Screenshots
Saving and sharing screenshots on a Chromebook is straightforward. By default, all screenshots are saved to your "Downloads" folder in JPG format. You can easily share these files via email, Google Drive, or social media platforms.
Sharing via Google Drive
Google Drive is an excellent option for sharing screenshots, especially if you collaborate with others frequently. Simply upload your screenshot to Google Drive and share the link with your intended recipients.
Sharing via Social Media
If you want to share your screenshot on social media, you can upload it directly from your "Files" app. Most social media platforms, including Facebook, Twitter, and Instagram, support image uploads from Chromebooks.
Tips and Tricks for Better Screen Capturing
Here are some tips to help you make the most out of your Chromebook’s screen capture capabilities:
- Use Keyboard Shortcuts: Mastering keyboard shortcuts will save you time and effort when capturing screenshots.
- Explore Third-Party Apps: If you need advanced features, consider installing third-party apps like Snagit or Greenshot.
- Organize Your Files: Keep your screenshots organized by creating separate folders in your "Files" app.
- Backup Regularly: Use Google Drive or another cloud storage service to back up your screenshots regularly.
How Chromebook Screen Capture Compares to Windows
While both Chromebooks and Windows devices offer robust screen capture tools, there are some key differences to consider:
Windows Snipping Tool
Windows users have access to the Snipping Tool, which allows them to capture full screens, windows, and custom regions. However, this tool lacks some of the advanced features found in third-party apps like Snagit.
Chrome OS Screenshot Tool
Chrome OS provides a similar level of functionality with its Screenshot Tool, but it integrates seamlessly with Google services like Google Drive and Google Photos. This makes it easier to save, share, and collaborate on screenshots.
Common Issues and Troubleshooting
While Chromebook screen capture tools are generally reliable, you may encounter some issues. Here are some common problems and solutions:
Screenshot Not Saving
If your screenshot isn’t saving, try clearing your "Downloads" folder or checking your storage space. You can also try restarting your Chromebook to resolve the issue.
Keyboard Shortcut Not Working
If your keyboard shortcuts aren’t working, ensure that your keyboard is functioning properly and that no other keys are being pressed simultaneously. You can also check your keyboard settings in Chrome OS to confirm that the shortcuts are correctly configured.
Conclusion: Mastering Screen Capture on Chromebook
In conclusion, Chromebooks offer a variety of tools and methods for capturing and editing screenshots. From built-in keyboard shortcuts to advanced third-party apps, you have everything you need to capture and share high-quality images. By following the tips and tricks outlined in this guide, you can become a pro at screen capturing on your Chromebook.
We encourage you to try out the different methods and tools discussed in this article. Don’t hesitate to leave a comment below if you have any questions or suggestions. Additionally, feel free to share this article with others who might find it useful. Happy screen capturing!
For more insightful articles and guides, explore our other content on our website.